[phpBB Debug] PHP Notice: in file /viewtopic.php on line 988: date(): It is not safe to rely on the system's timezone settings. You are *required* to use the date.timezone setting or the date_default_timezone_set() function. In case you used any of those methods and you are still getting this warning, you most likely misspelled the timezone identifier. We selected 'Europe/Moscow' for 'MSK/3.0/no DST' instead
[phpBB Debug] PHP Notice: in file /viewtopic.php on line 988: getdate(): It is not safe to rely on the system's timezone settings. You are *required* to use the date.timezone setting or the date_default_timezone_set() function. In case you used any of those methods and you are still getting this warning, you most likely misspelled the timezone identifier. We selected 'Europe/Moscow' for 'MSK/3.0/no DST' instead
SolaraGuy.com • View topic - yet another LED guide
Talk about aftermarket Toyota Solara Gen 1-1.5 upgrades.

yet another LED guide

yet another LED guide

Postby dinoxor » Tue Jul 26, 2011 12:40 pm

So after reading numerous past posts and researching intensively on this LED subject I have finally compiled a semi complete reference guide on what I bought and the quality these lights produced!

first off I would like to say that this guide will only act as a reference and that you should do this at your own risk! since I will not be responsible for your action and what could happened!

Alright now off to work:
before you start you should use this guide here to figure out how to actually install these lights.

So for the majority of the leds I bought them from http://www.superbrightleds.com

Dome and map/ reading lights

upon measurements I have decided to go with these
Image
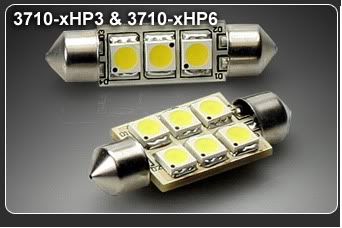
one 3710-HPx3 and one 3710-HPx6 cool white
both fits perfectly in the reading and dome housing

At first I've decided to put the 6 hp festoon in the back and the 3 hp led in the front but upon decision the 6 leds were way to bright for my taste and ended putting the 6 led in the front facing upward so it wouldn't be as bright.
So in my opinion buying two 3 leds should be perfect and gives just the perfect amount of light.
however since I have the tan interior, it looks kinda pale and sickly but I think the cool white color looks better inside a black interior
all in all this still looks bad ass
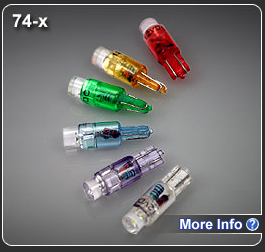
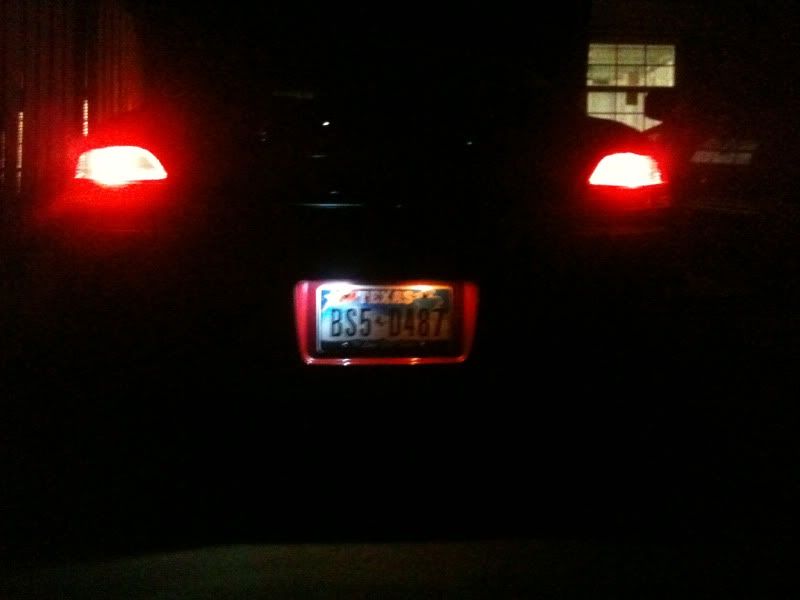
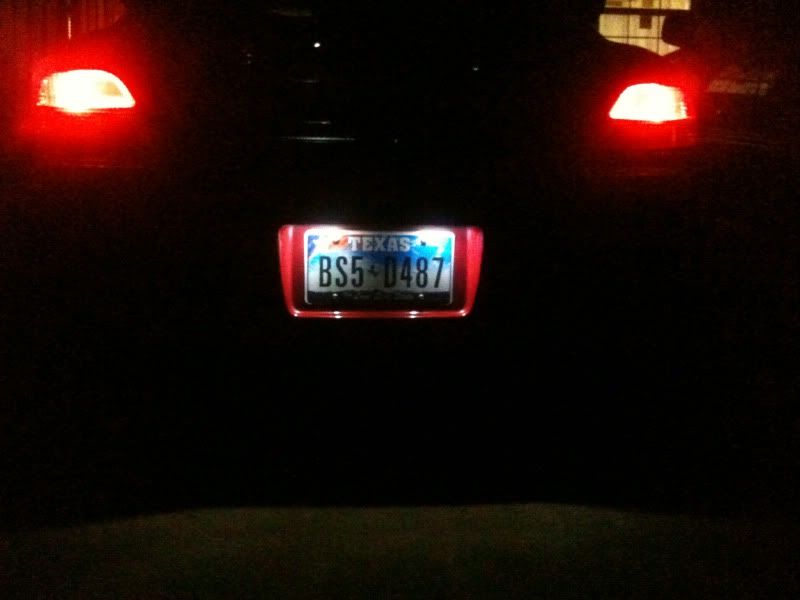
License plate

Image
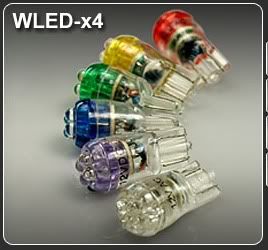
two cool white 194 4 leds 90 degrees

thought my dirty housing was gonna affect the output but nope these guys were perfect!
not too bright yet not too dim either!

Trunk

Image
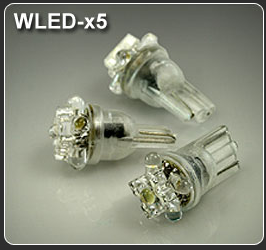
one cool white 194 5 matrix led

these guys should look like a ninja star and one sticking in the middle but works perfectly!
the only draw backs is that it's not as bright as I thought it would be but does what it's suppose to and seems brighter than the stock one!
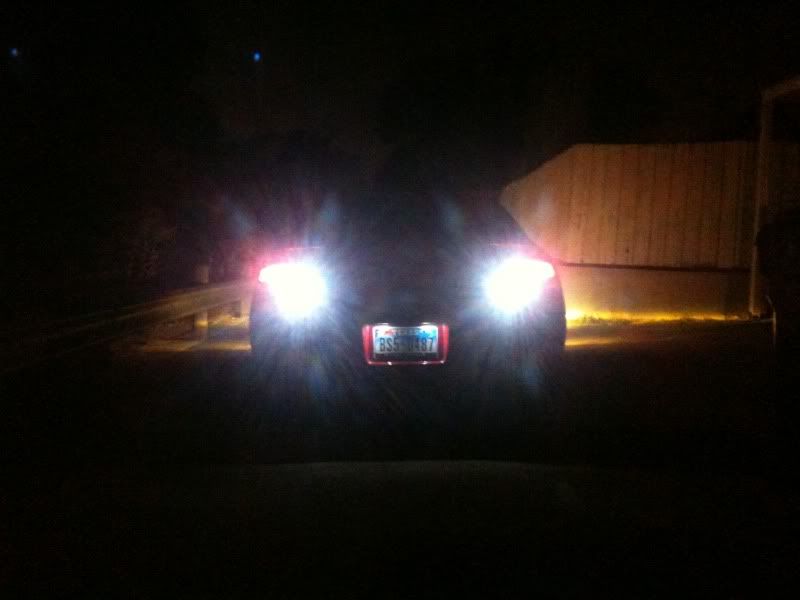
Reverse

Image
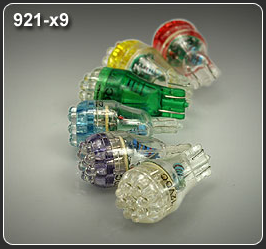
two cool white 921 9 led

I wasn't planning on replacing my reverse lights at first but I thought to myself what the heck why not.
all I have to say is that it is WAAAAYY brighter than the old stock ones and looks way cooler at night
and not to mention increase awareness from drivers around you due to it's brightness!

-----------------------------------------------------------------------
I am done with all of my interior lighting except for the glove box, hvac and the cig ring.
however due to the lack of free time this is as far as I have written and may not be able to finish until later.
hope this help as of now and I shall post up some resulting pictures and finish this thread whenever I can!
User avatar
dinoxor
SolaraGuy Driver
SolaraGuy Driver
 
Posts: 439
Joined: Wed Jun 02, 2010 6:04 pm
Location: Garland, TX

Re: yet another LED guide

Postby St.Anton » Tue Jul 26, 2011 2:08 pm

Thanks for the post! Deciphering bulb sizes was killing me.

You got any plans to do the ignition ring?
User avatar
St.Anton
Just Licensed SolaraGuy
 
Posts: 47
Joined: Mon Jul 04, 2011 1:47 am

Re: yet another LED guide

Postby dinoxor » Tue Jul 26, 2011 11:19 pm

already did them :D
used the blue x74 led
Image

at first it was too long so I used a blue bulb instead but it wasn't bright enough...
So I sanded down the led or rather grind it against the cement until it reached the desired length and then used some leftover 1500 grit sandpaper to smooth it out a bit.
As a result it worked great!
User avatar
dinoxor
SolaraGuy Driver
SolaraGuy Driver
 
Posts: 439
Joined: Wed Jun 02, 2010 6:04 pm
Location: Garland, TX

Re: yet another LED guide

Postby St.Anton » Wed Jul 27, 2011 1:27 am

Nice. Are all your interior lights blued out? Care to share pics? I wanna do the interior but I have a feeling i'm gonna wanna do EVERYTHING. Sucks that I just bought a red deck, but i'll change it up man I don't care.
User avatar
St.Anton
Just Licensed SolaraGuy
 
Posts: 47
Joined: Mon Jul 04, 2011 1:47 am

Re: yet another LED guide

Postby GzNutz » Thu Jul 28, 2011 4:10 am

St.Anton wrote:Nice. Are all your interior lights blued out? Care to share pics?


Yeah, lets see some pics! :)
User avatar
GzNutz
SolaraGuy Semi-Pro Racer
 
Posts: 2354
Joined: Mon Oct 22, 2007 7:36 pm
Location: Land of Beer

Re: yet another LED guide

Postby dinoxor » Thu Jul 28, 2011 11:18 am

Lol I will once I come home from camp on monday :D
User avatar
dinoxor
SolaraGuy Driver
SolaraGuy Driver
 
Posts: 439
Joined: Wed Jun 02, 2010 6:04 pm
Location: Garland, TX

Re: yet another LED guide

Postby St.Anton » Mon Aug 01, 2011 6:39 am

Hey dinoxor you said you used 921 x9 for your reverse lights.

Is there any reason you didn't use x12? I want my back to look like daylight when i'm reversing.
User avatar
St.Anton
Just Licensed SolaraGuy
 
Posts: 47
Joined: Mon Jul 04, 2011 1:47 am

Re: yet another LED guide

Postby dinoxor » Mon Aug 01, 2011 12:43 pm

aww mann I thought I could edit my post later on :/
I don't want it to be a two part deal....

anywayss here are some pictures as promised:

License Plate

Image
before and after

Image
up close

Image
both on

looks pretty BAD ARSE ;]


Gauge

Image
5 194x5 matrix

Use this guide to remove the gauge clusters: http://solaraguy.com/viewtopic.php?f=20&t=21746
It was quite easy but I had to run to the hardware store to grab some small phillip screw drivers to remove the first two screws...
not to mention a cute girl was at the check out and I was quite embarrassed to buy something so small ;[

anyways after removing the first to screws at the top you would need to pull the black surrounding foward towards you.
as you can see on the third picture that big 'ol hole is where the black surrounding is held by toyota's super clip.
So don't make the same mistake as I did and wiggled it around and break it :(
After removing the cluster there should be 5 green knob looking things.
twist to unlock and pull and then pull the old bulbs from the socket and replace it with the wedge leds then twist it back in and voila done!


as for the turn signals I bought regular 74 bulbs at http://www.autolumination.com

Image
red and orange 74 bulb

their quality was horrible and the metal strips were loose and keeps falling out and one of them has a tail as you can see.... so you HAVE TO BE REALLY CAREFUL
however the leds will not fit in the turn signal slots since the diameter is way to big and will cause it to stretch so bulbs are the way to go.

Image
green tint thing

after changing the bulbs you would need to replace the green tint on the signal with something else so it would not have a green tint.
I used white computer paper but after a while I did not like the looks of it.
made the signal somewhat pinkish so in my opinion replace it with red cellophane paper to hide the white arrows during the daytime and to make it look a little darker.

Automatic shiftgate lights

removing the tint
Image
remove the screws circled red to remove the face plate
and remember to screw it back on somewhat tight or the needle will not work

Image
green and orange tint

I was planning on using purple and red bulbs to replace individual drive but got lazy since it was arleady a pain to remove the 74 signal bulbs and left it as is giving all of the lights an orange square

Image
result. The blue is actually darker than that is shown in the picture.

My car was in drive and should be orange but since I squeezed that led in, the bulb socket is now loose

overall I like the blue but I think cool white might be a little better but I know that there is a green tint throughout the whole guage.
however the only problem I have is that I had a hard time reading the needle.
If I could I would stick a white led at the pivoting point of the needle to give it a glow and at the same time lighting up the red needle.

but as of now I read somewhere that you can use nail polish remover and gently rub below the needle to remove the red tint.


Shiftgate

man this guy was a pain in the ass

use these two guides:
http://solaraguy.com/viewtopic.php?f=1& ... =shiftgate
http://solaraguy.com/viewtopic.php?f=2& ... e&start=15

but yeah use a towel act as cushion when lifting it up

Image
finally lifted it up using flat head and pulling it up from what the thread told me to wedge.

Image
the led sits in this little compartment on the left side of the shiftgate

Image
the cutout where the led goes

Image
replacing the bulb

Result:
Image
lool looks like it's floating

But as you can see the R looks like it's missing but I'm not really sure how to fix that except to get rid of the tint on the gates itself.
make sure everything is in working order and the button at the top left should work allowing you to switch gears without holding the brake.


Ignition

Image
take #1 lights off

Image
take #2 lights on

looks veddy nice ;]
and yes it fades like that!
again the blue should be a little darker but overall I am VERY content
wish there was a mod to KEEP IT TURNED ON :[

-------------------------------------------------------------------------------------

St.Anton wrote:Hey dinoxor you said you used 921 x9 for your reverse lights.

Is there any reason you didn't use x12? I want my back to look like daylight when i'm reversing.


It is all up to preference
I want my led to be brighter than my stock light but at the same time something subtle and nothing too over bearing

Image
camera made it WAAAYYY brighter than it needed to be

I can't capture it but it was perfect in my opinion!
The camera made it look super bright but in person it gives this nice cool white glow and bright enough to warn others from behind

you can use x12 if you want but it's all up to preference :]

I'm here to guide you but really it's up to you on how you would want your car to look like!

---------------------------
as for the trunk and interior.
I was not able to capture the badassness with my phone but whenever my friend lend me his fancy camera then I shall post up pics whenever I can :D
User avatar
dinoxor
SolaraGuy Driver
SolaraGuy Driver
 
Posts: 439
Joined: Wed Jun 02, 2010 6:04 pm
Location: Garland, TX

Re: yet another LED guide

Postby dinoxor » Thu Dec 27, 2012 1:58 am

It has been at least a year since I've written this diy and would like to give this thread a quick update.

Dome:
I went ahead and switched the two back with 6 leds for the main and 3 leds up front.
There's no such thing as "too bright" when you lose something in the back seat or underneath your front seats.
I would recommend pure white leds now instead of "cool white" for those with tan interior.
The "cool" white reflects a sickly atmosphere inside my tan interior at night.

But If you have a charcoal interior, then I think "cool white" would go with it.

License Plate:
I got pulled over for having a "slight" blue; therefore, if you want to avoid violating the law then go with pure white.

Reverse:
I regretted getting ones with regular leds.
again there is no such thing as too bright.
Go with the high powered SMD led
With 20% tint for my rear windshield, it was very difficult parallel parking at night since I simply could not see whats behind me.

Trunk:
Again the regular leds were too dim so I switched it out with a high powered 5 SMD leds wide angles
The results were ALOT better than before

Cluster:
The blue makes the needle VERY hard to read.
I am planning to switch to either white or cool white

Shift Gate:
Again white should be the color choice since the tint makes it hard to read the letters

Lastly
turn signals:
Don't use white computer paper as it will make your arrows emit a slightly pinkish color
if possible use black tint of some sort.

I believe I bought these bulbs when I went through a "ricey" phase
these "cool white" reminds me of all the beat up honda's with super blue 8k hids
I think I grew out of this phase and would like if you may consider my update

But then again, to each its own

Stay classy
User avatar
dinoxor
SolaraGuy Driver
SolaraGuy Driver
 
Posts: 439
Joined: Wed Jun 02, 2010 6:04 pm
Location: Garland, TX

Re: yet another LED guide

Postby GzNutz » Thu Dec 27, 2012 11:12 am

Thanks for sharing!
User avatar
GzNutz
SolaraGuy Semi-Pro Racer
 
Posts: 2354
Joined: Mon Oct 22, 2007 7:36 pm
Location: Land of Beer

Return to Aftermarket Gen1 and 1.5

Who is online

Users browsing this forum: No registered users and 5 guests