DIY radar mount, install, hardwire
![]() by dinoxor » Sat Oct 22, 2011 1:27 pm
by dinoxor » Sat Oct 22, 2011 1:27 pm
First off I do not want to take credit for this idea but rather integrating the idea to our gen 1 and 1.5 cars.
The original link to this tutorial can be found here and I would HIGHLY recommend that you should read it first to get a general idea!
http://www.planet-9.com/cayman-boxster-electronics/37014-el-cheapo-rearview-mirror-mount-passport-9500ix.html
Okay so to clear things up that there has been a lot of debate on the placement of the radar unit itself.
And after intensive research I've concluded, or somewhat came to a conclusion, that the higher the mount the better your radar detection but your laser detection will decline due to the laser's sight will more likely be shot at your license plate which is the most reflective unit in front of your car.
By having it mid way on your rear view, there is a balance between radar and laser detection which is common where I live so it is up to preference!
Plus I don't have to constantly remove my suction cup anymore and having to worry about someone breaking into my car.
Now that that's cleared up lets begin!
Materials needed:
your radar (in this case my 8500 x50)
your radar's mount with the suction removed
1 cateye reflector (I thought I was going to cough up $5.00 for one but my local bike shop gave it to me for free!)
2 nuts and bolts (I forgot the nut and bolt size :/ sorry I trialed and error until I got a perfect match)
2 washers
small piece of rubber (to wrap around the stem of the rear-view mirror)
- I use a piece of rubber from my old dell ac adapter to make several wrap around the stem, you can use a piece from a rubber hose if needed.
optional: black plasitdip or spray paint!
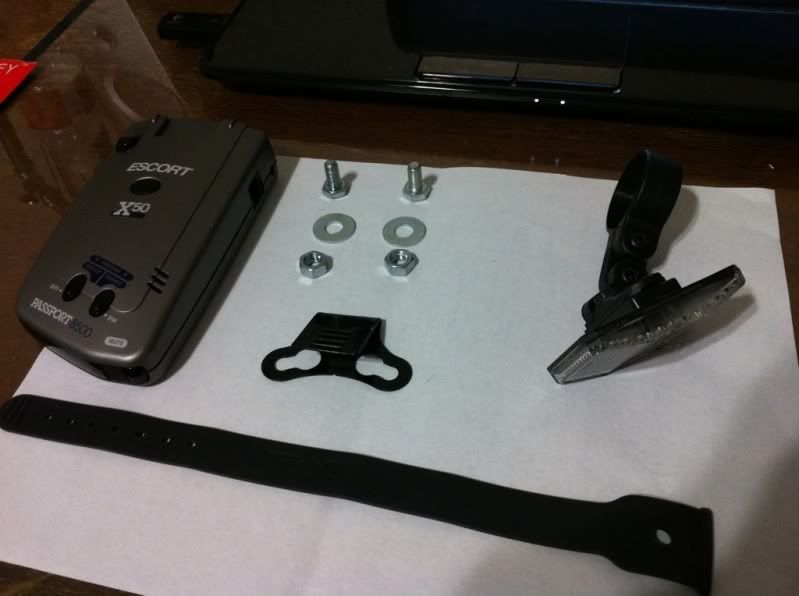
all of the materials listed above
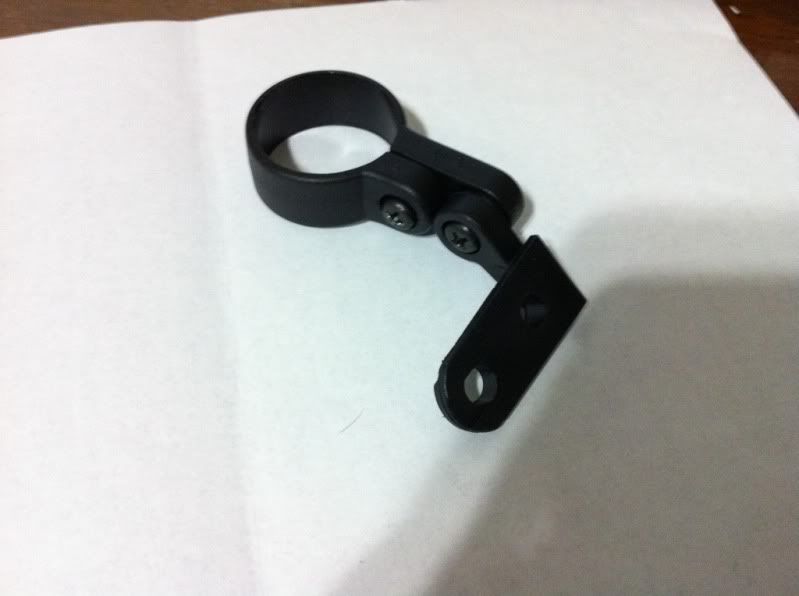
1) remove the reflector with a simple screwdriver
2) decide on how you want to connect it together.
2a) OPTIONAL: paint your nuts and bolts black to give it a more flush look!
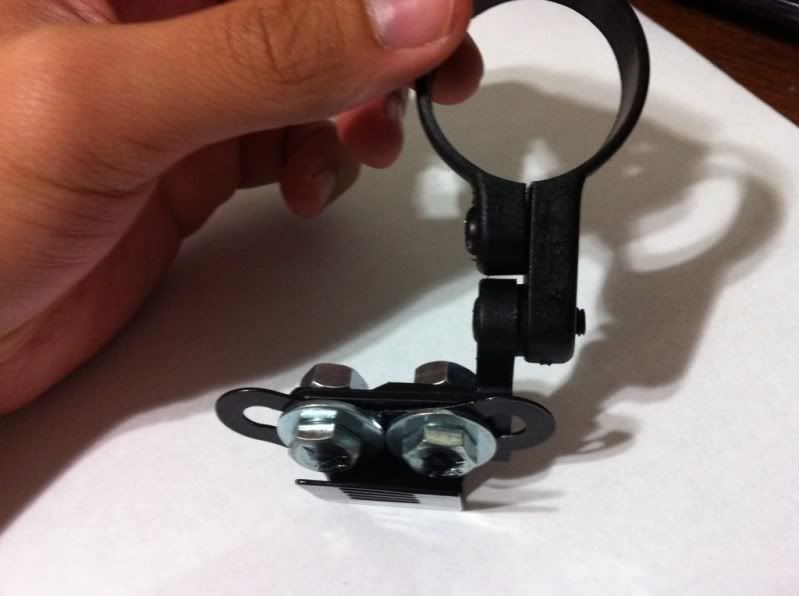
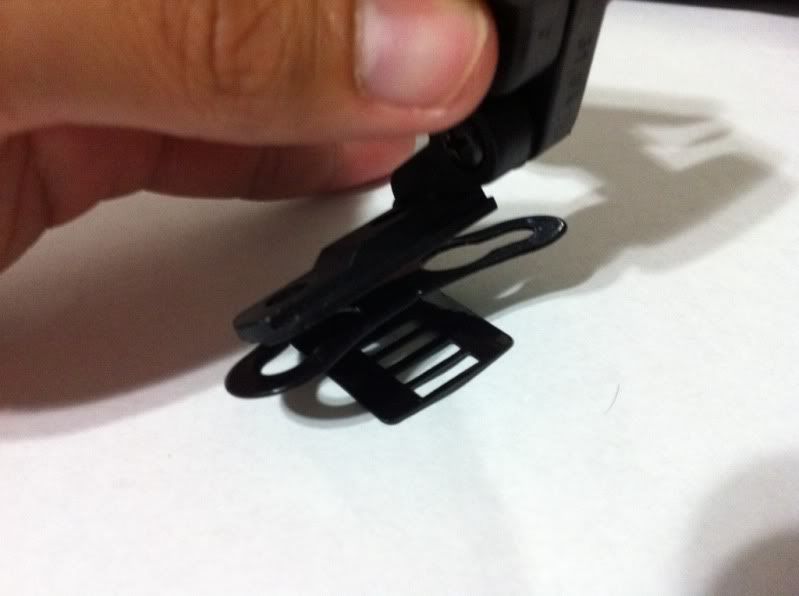
3) put everything together.
I've decided to put the nut on top since it fits a bit better
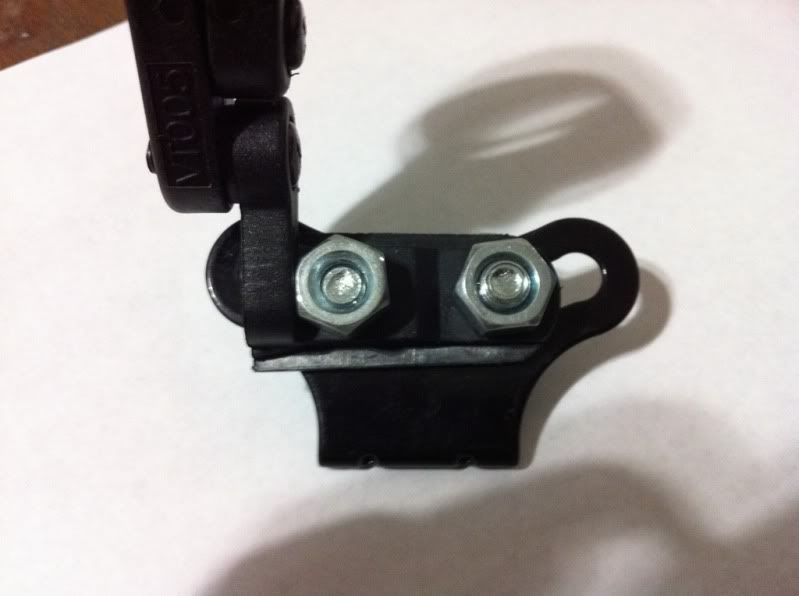
top view (luckily the nut fits flush with the plastic on the left)
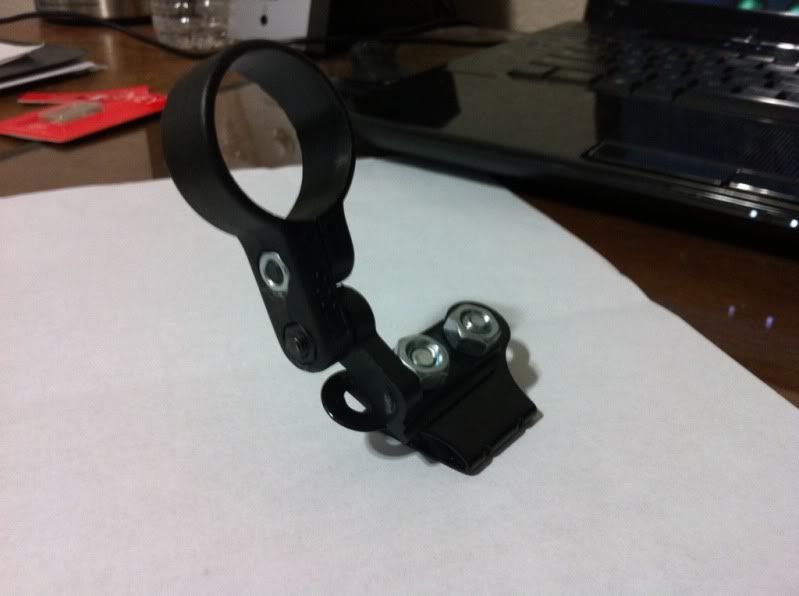
front and back view
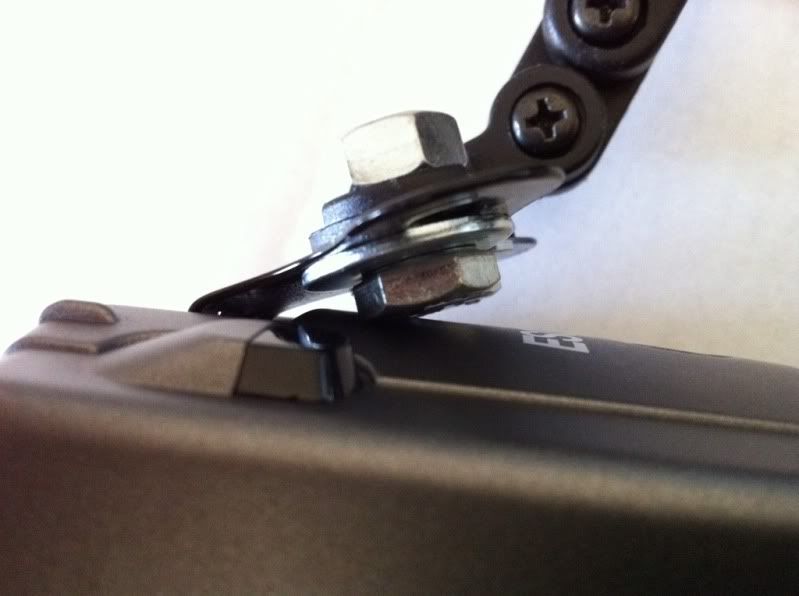
slide your radar inside to make sure you have clearance between the bolt and the radar
- mines a tight fit but no scratches so far
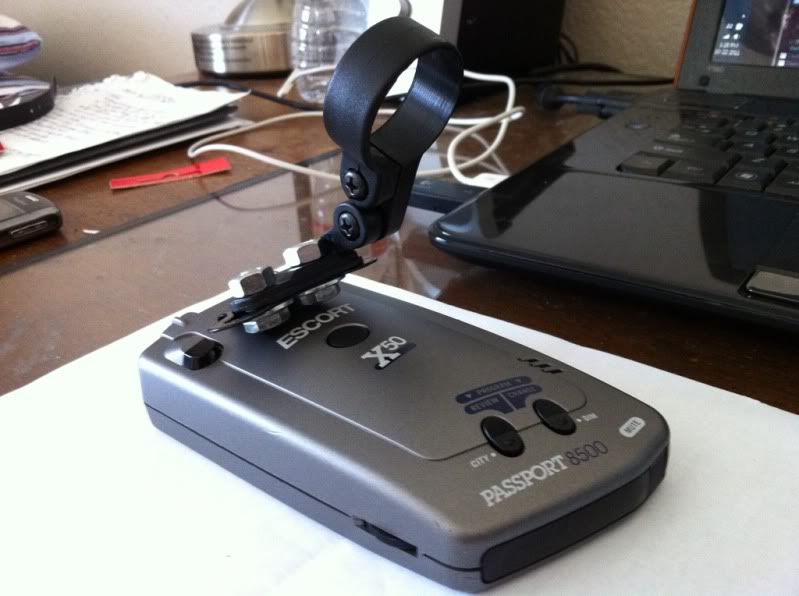
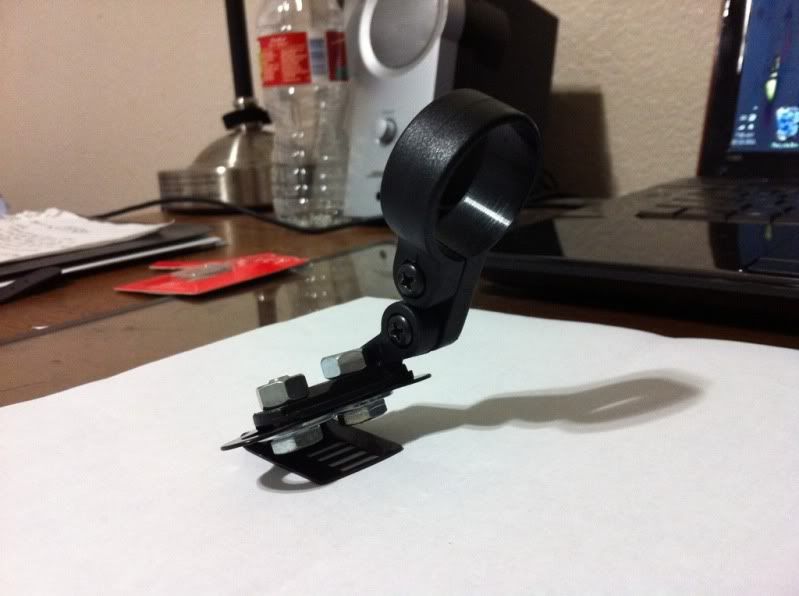
finished product!
INSTALLATION:
remove your radar prior to installing to the stem to mitigate the installation process.
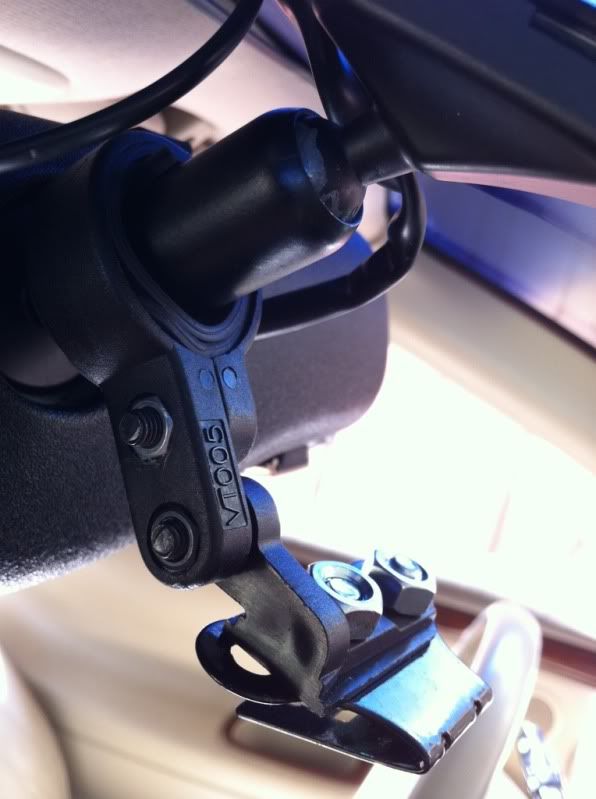
use whatever rubber piece you decided and wrap around the stem to make the stem fatter.
eventually the bike clamp should fit snuggly, then tightened the clamp with your screw driver
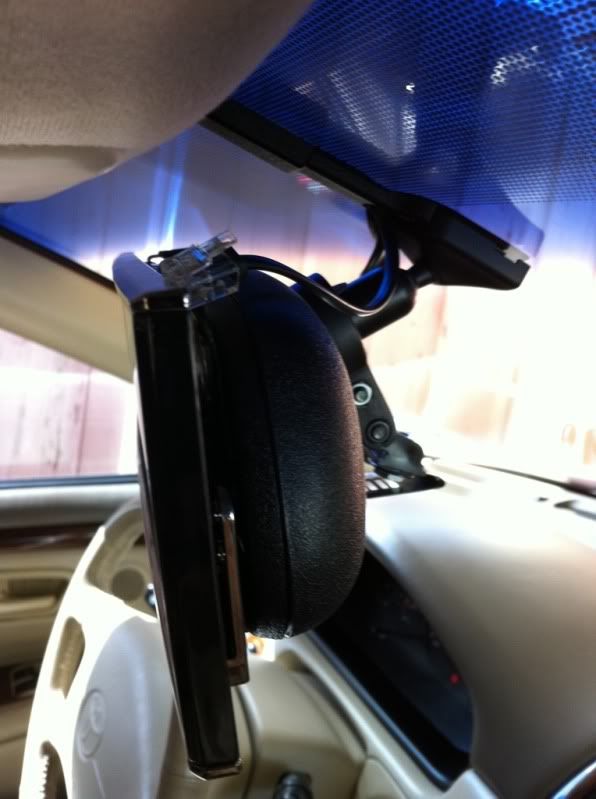
The next step is rather tedious since we have two ball and socket pivot point on the rear view mirror
park in a nice leveled ground and pivot your radar stem, bend your radar mount to get a nice leveled radar.
You DO NOT WANT YOUR RADAR TO POINT TO THE SKY OR GROUND
That has got to be my number one pet peeve since I have always seen people driving it with it pointing up or down...
not only is it ineffective it looks DUMBB don't do it!!!
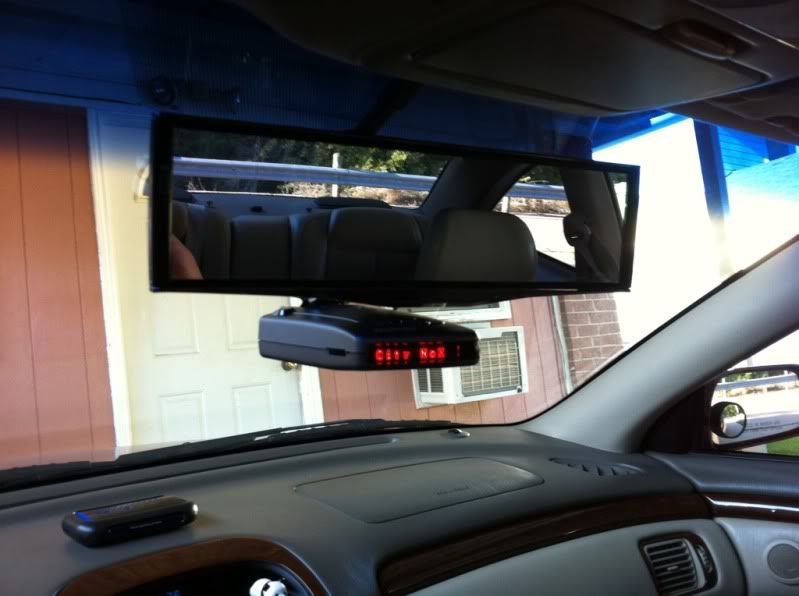
nice and even, although I have the auto-dimming mirror with the chin or tongue
the radar sits snuggly
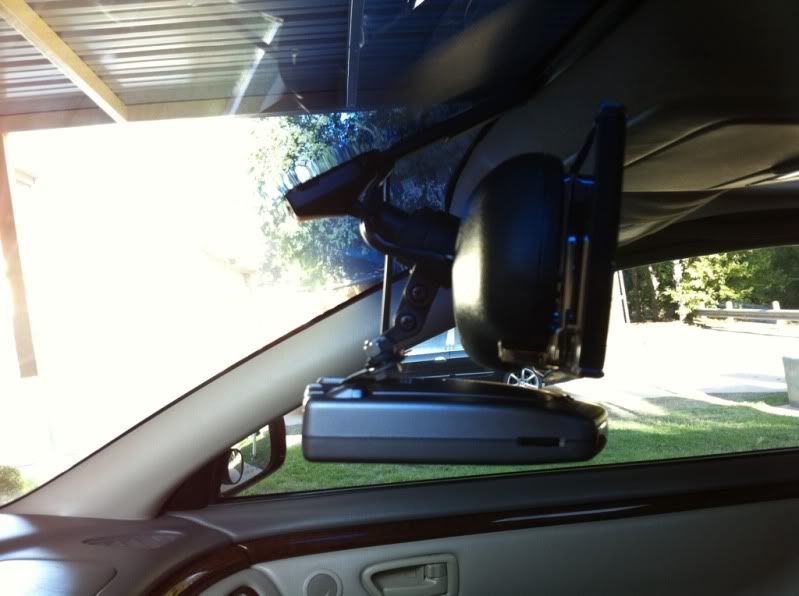

side and outside view.
TIP: when parking the car remember to hide your wire, if you leave it hanging it will defeats the purpose of deterring theft!
heres where I placed my phone head
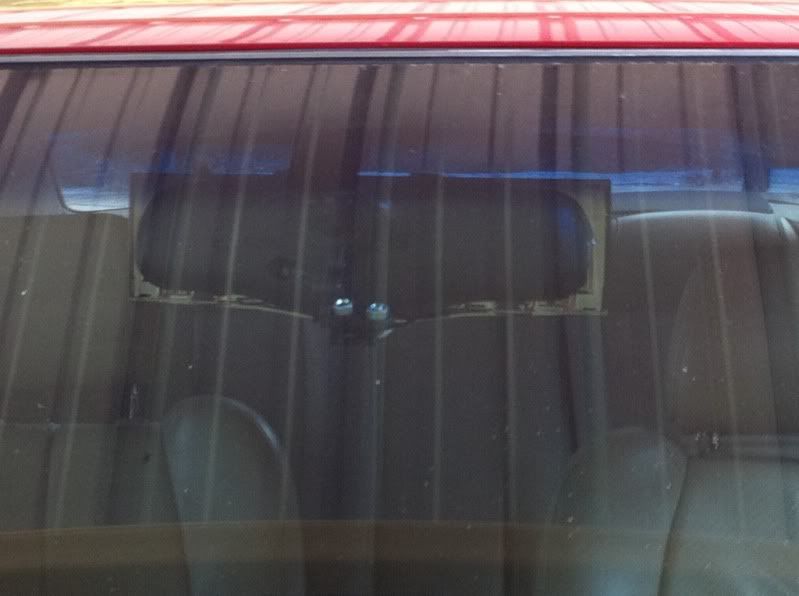
outside view
not too bad It would look A LOT stealthier if I were to paint the nuts and bolts black
but as of now it looks good
HARDWIRING:
After a lot of research I thought this was going to be hard but it was rather simple if you have the right tools and time!
Materials:
direct hardwiring cord (Source: http://safe-n-sound1.com/)
The cords felt nice and seems very high quality although it was around $13
so I bought the direct cord with mini blade fuse tap and a flat mute button :http://www.safe-n-sound1.com/Beltronics%20Direct%20Cord%20Flat%20Mute.html
screw drivers
patiences
The wiring kit that came with it was VERY straight forward.
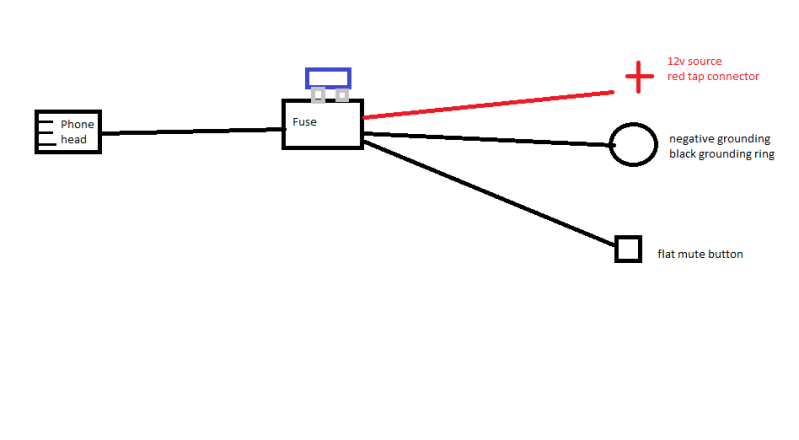
unfortunately I bought my phone after the installation so I do not have pictures but hopefully my ghetto diagram will help:
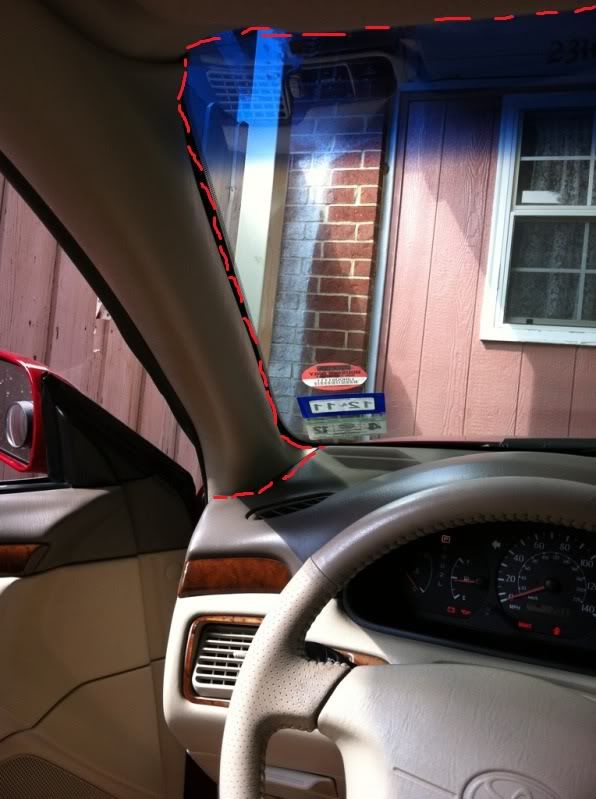
1) Pop off the lower left coin holder below the left vent
Disassemble lower dash panel (I'm getting tired so use the search function here to find out how to achieve this)
This panel is held by two screws I think and 2 toyota super clip so gotta use some force to pull it out.
2) connect the phone head and the red tap connector and the black ground ring to make sure everything works!
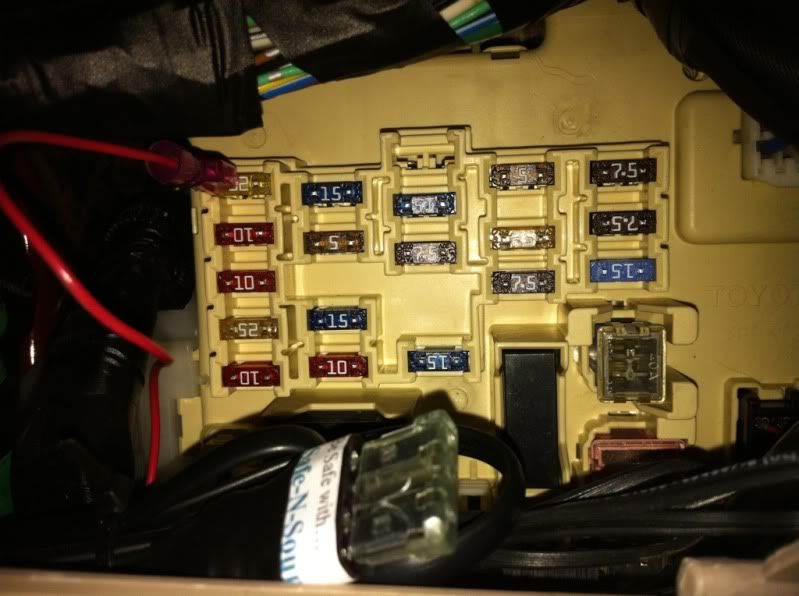
The website shows how you connect the mini fuse blade and I use the 20A seat heater fuse to get my 12 volt source
again this is located on the bottom left behind the small coin holder
make sure your GROUNDING IS SCREWED ON AND TOUCHING A METAL SURFACE! grounding is VERY important!
3) after turning your car to acc your radar should turn on
the reason why I used the heat seater was so the radar will turn on each time your car is turned on and vise versa to prevent battery drainage.
4) Unhook everything and mount your radar and gestimate how much wire is needed
this is the where I tucked my wires all the way to the fuse box
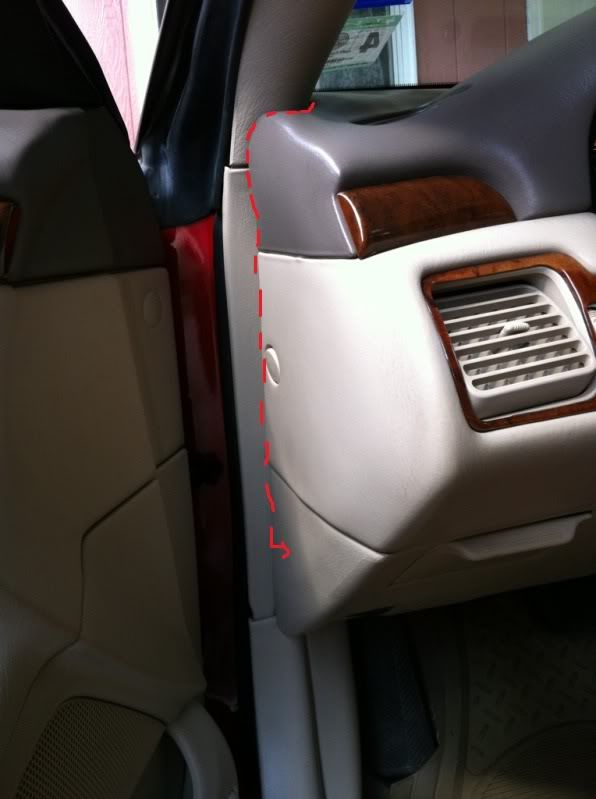
5) OPTIONAL: If you did get a mute cord find out where you would like to place it and open whatever panel to get it there
In this case this is where I put mine :
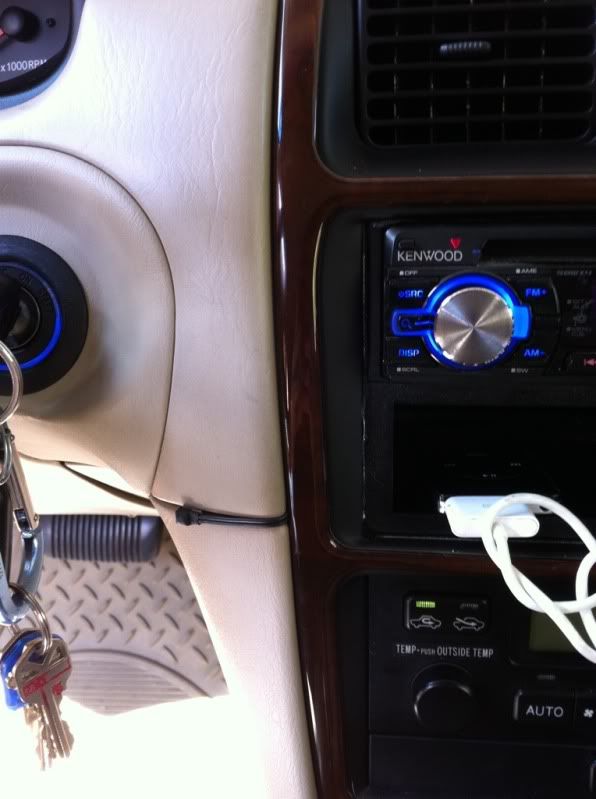
doesn't look too out of place but requires taking off the center console and the key ignition cover to get it there.
6) The kit comes with zip ties so use those to coil and bunch up whatever wires
clean everything up and make sure it works before putting the panels back!
also make sure your fuse from the kit has an easy access so in case it DOES break you have easy access
again you can see I just stuck it in front of the fuse (it has a safe-n-sound sticker if you can't tell)
PUT EVERYTHING TOGETHER AND BAM YOU GOT YOURSELF A SEXY SET UP THAT GUARANTEES YOU TO GET SOME POONANI WITHOUT HAVING THAT COILED WIRE IN THE WAY! ;]
So all in all:
bike mount: free
nut and bolt : $1.50
direct cord : $12.00
TOTAL: $13.50
pretty cheap compared to that dang $80 blendmount
CONCLUSION:
after a weeks of using this set up the only problem I see was the weight of the radar occasionally pulling the rearview mirror stem down a bit.
stupid double ball and socket design...
but this set up has gotten me so many poon that it don't matter!
good luck!
feel free to post your questions, comments, or concerns!
The original link to this tutorial can be found here and I would HIGHLY recommend that you should read it first to get a general idea!
http://www.planet-9.com/cayman-boxster-electronics/37014-el-cheapo-rearview-mirror-mount-passport-9500ix.html
Okay so to clear things up that there has been a lot of debate on the placement of the radar unit itself.
And after intensive research I've concluded, or somewhat came to a conclusion, that the higher the mount the better your radar detection but your laser detection will decline due to the laser's sight will more likely be shot at your license plate which is the most reflective unit in front of your car.
By having it mid way on your rear view, there is a balance between radar and laser detection which is common where I live so it is up to preference!
Plus I don't have to constantly remove my suction cup anymore and having to worry about someone breaking into my car.
Now that that's cleared up lets begin!
Materials needed:
your radar (in this case my 8500 x50)
your radar's mount with the suction removed
1 cateye reflector (I thought I was going to cough up $5.00 for one but my local bike shop gave it to me for free!)
2 nuts and bolts (I forgot the nut and bolt size :/ sorry I trialed and error until I got a perfect match)
2 washers
small piece of rubber (to wrap around the stem of the rear-view mirror)
- I use a piece of rubber from my old dell ac adapter to make several wrap around the stem, you can use a piece from a rubber hose if needed.
optional: black plasitdip or spray paint!
all of the materials listed above
1) remove the reflector with a simple screwdriver
2) decide on how you want to connect it together.
2a) OPTIONAL: paint your nuts and bolts black to give it a more flush look!
3) put everything together.
I've decided to put the nut on top since it fits a bit better
top view (luckily the nut fits flush with the plastic on the left)
front and back view
slide your radar inside to make sure you have clearance between the bolt and the radar
- mines a tight fit but no scratches so far
finished product!
INSTALLATION:
remove your radar prior to installing to the stem to mitigate the installation process.
use whatever rubber piece you decided and wrap around the stem to make the stem fatter.
eventually the bike clamp should fit snuggly, then tightened the clamp with your screw driver
The next step is rather tedious since we have two ball and socket pivot point on the rear view mirror
park in a nice leveled ground and pivot your radar stem, bend your radar mount to get a nice leveled radar.
You DO NOT WANT YOUR RADAR TO POINT TO THE SKY OR GROUND
That has got to be my number one pet peeve since I have always seen people driving it with it pointing up or down...
not only is it ineffective it looks DUMBB don't do it!!!
nice and even, although I have the auto-dimming mirror with the chin or tongue
the radar sits snuggly
side and outside view.
TIP: when parking the car remember to hide your wire, if you leave it hanging it will defeats the purpose of deterring theft!
heres where I placed my phone head
outside view
not too bad It would look A LOT stealthier if I were to paint the nuts and bolts black
but as of now it looks good
HARDWIRING:
After a lot of research I thought this was going to be hard but it was rather simple if you have the right tools and time!
Materials:
direct hardwiring cord (Source: http://safe-n-sound1.com/)
The cords felt nice and seems very high quality although it was around $13
so I bought the direct cord with mini blade fuse tap and a flat mute button :http://www.safe-n-sound1.com/Beltronics%20Direct%20Cord%20Flat%20Mute.html
screw drivers
patiences
The wiring kit that came with it was VERY straight forward.
unfortunately I bought my phone after the installation so I do not have pictures but hopefully my ghetto diagram will help:
1) Pop off the lower left coin holder below the left vent
Disassemble lower dash panel (I'm getting tired so use the search function here to find out how to achieve this)
This panel is held by two screws I think and 2 toyota super clip so gotta use some force to pull it out.
2) connect the phone head and the red tap connector and the black ground ring to make sure everything works!
The website shows how you connect the mini fuse blade and I use the 20A seat heater fuse to get my 12 volt source
again this is located on the bottom left behind the small coin holder
make sure your GROUNDING IS SCREWED ON AND TOUCHING A METAL SURFACE! grounding is VERY important!
3) after turning your car to acc your radar should turn on
the reason why I used the heat seater was so the radar will turn on each time your car is turned on and vise versa to prevent battery drainage.
4) Unhook everything and mount your radar and gestimate how much wire is needed
this is the where I tucked my wires all the way to the fuse box
5) OPTIONAL: If you did get a mute cord find out where you would like to place it and open whatever panel to get it there
In this case this is where I put mine :
doesn't look too out of place but requires taking off the center console and the key ignition cover to get it there.
6) The kit comes with zip ties so use those to coil and bunch up whatever wires
clean everything up and make sure it works before putting the panels back!
also make sure your fuse from the kit has an easy access so in case it DOES break you have easy access
again you can see I just stuck it in front of the fuse (it has a safe-n-sound sticker if you can't tell)
PUT EVERYTHING TOGETHER AND BAM YOU GOT YOURSELF A SEXY SET UP THAT GUARANTEES YOU TO GET SOME POONANI WITHOUT HAVING THAT COILED WIRE IN THE WAY! ;]
So all in all:
bike mount: free
nut and bolt : $1.50
direct cord : $12.00
TOTAL: $13.50
pretty cheap compared to that dang $80 blendmount
CONCLUSION:
after a weeks of using this set up the only problem I see was the weight of the radar occasionally pulling the rearview mirror stem down a bit.
stupid double ball and socket design...
but this set up has gotten me so many poon that it don't matter!
good luck!
feel free to post your questions, comments, or concerns!

-

dinoxor - SolaraGuy Driver

- Posts: 439
- Joined: Wed Jun 02, 2010 6:04 pm
- Location: Garland, TX